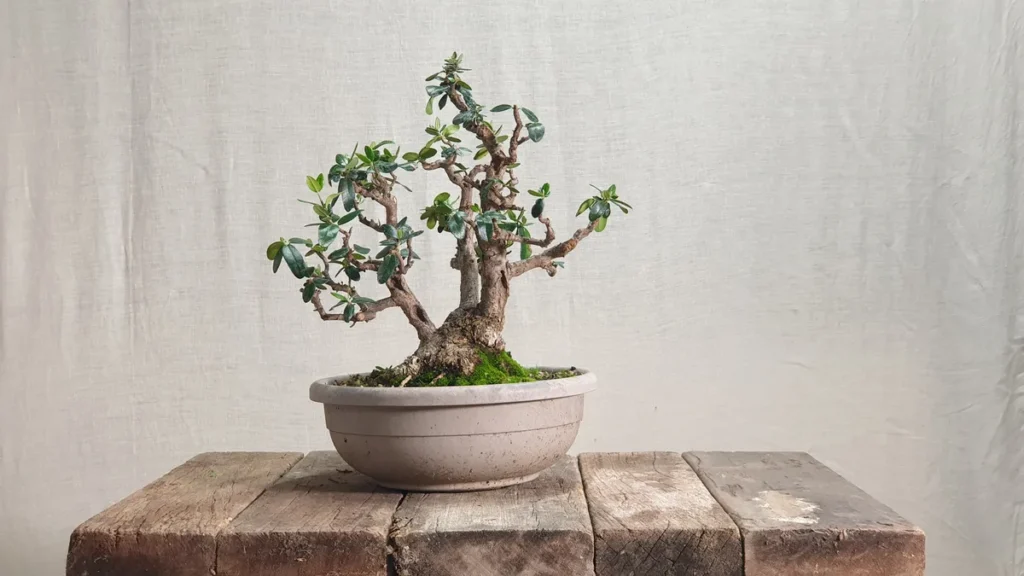
Some defects announce themselves from across the garden. Others hide under the soil line and wait for repotting day. This wild olive — an olivastro, Olea europaea var. sylvestris — arrived on the bench with a base most growers would envy: three trunks rising from a single broad, conical stump, the classic ceppaia form. And yet the most important work of its year happened below that beautiful base, correcting problems that only showed themselves once the tree was out of its pot.
This article follows the full session: what the old substrate concealed, which roots were removed and which were spared, why the best-looking part of the tree ended up deliberately buried, and how a ring of sphagnum moss is used to grow new roots at exactly the height the design needs. The whole repot is on video below. If you are new to repotting itself — timing, tools, the basic sequence — start with our guide to repotting a bonsai and come back for the olive-specific surgery.
A Wild Olive with Three Trunks — and a Problem Under the Soil
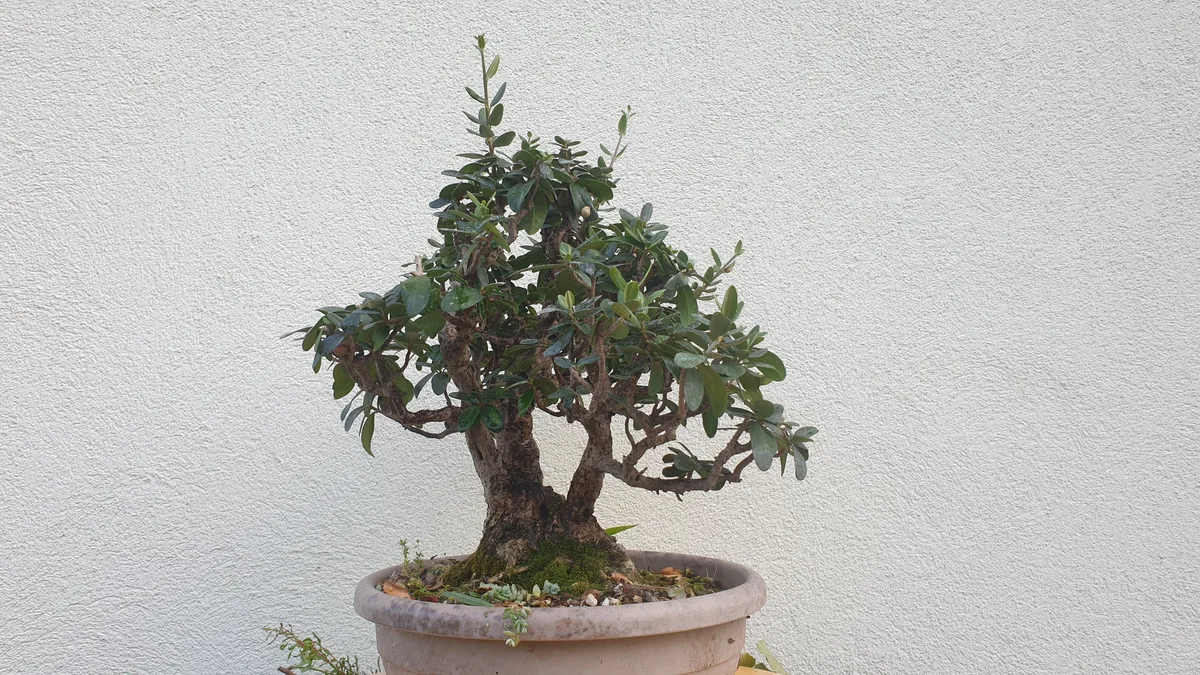
The tree came to us in 2024 from a previous owner, and its first season here was spent above ground: the canopy, originally far wider, was cut back hard and the ramification rebuilt close to the trunks, so that the tree’s silhouette could eventually match the compact power of its base. That phase worked — by autumn the three trunks were visible again, each carrying its own small crown.
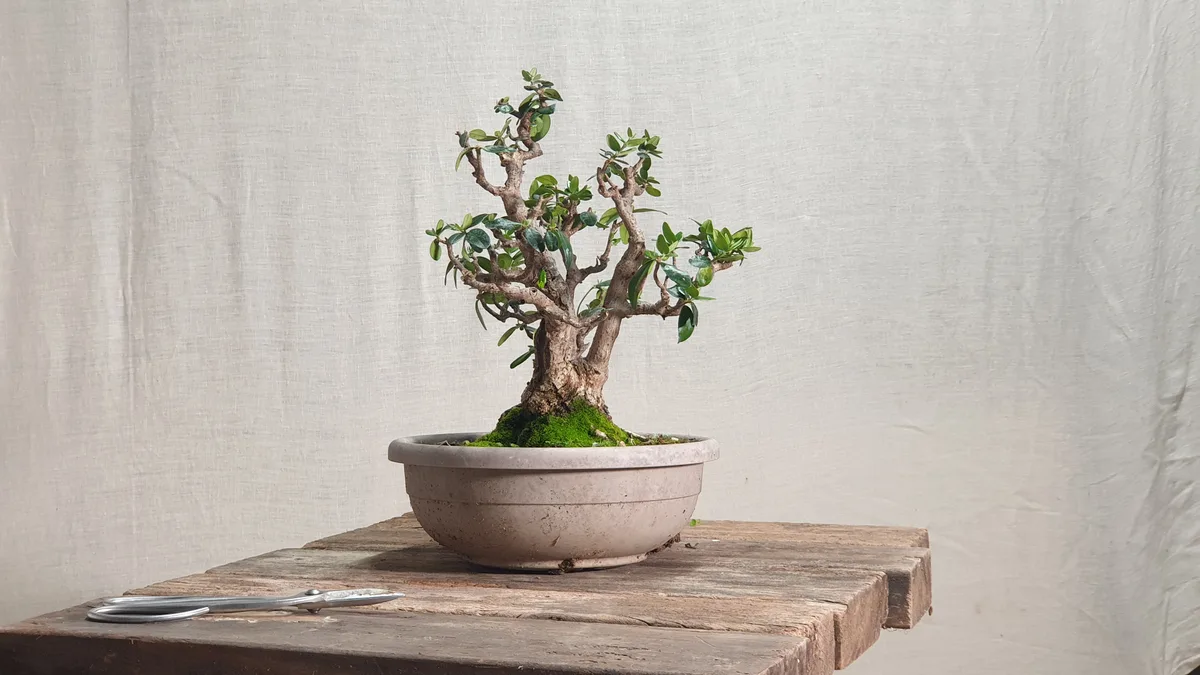
The base itself, though, had a history problem. The tree had been planted too high for too long, and the nebari — the surface roots that should radiate flat from the trunk — had responded the way olives do: by throwing inelegant roots high on the exposed crown while the real root mass dived underneath. Left alone, this is how a tree develops the unnatural “step” you see on many old, repeatedly high-planted bonsai: a shelf of exposed old wood where the base narrows before the soil, instead of flaring smoothly into it. The suspicion on repotting day was that vertical roots were hiding deeper in the pot as well. The suspicion turned out to be correct.
What the Repot Revealed: Clay, Gravel and a “Step” in the Base
Enjoying this session? Subscribe to our YouTube channel for more bonsai videos →
Out of the pot, the first discovery was the substrate: heavy clay and gravel, poorly aerated, closer to field soil than to anything a container tree should sit in — an inheritance from the previous owner. Here the olive’s nature worked in its favour. As a Mediterranean species, Olea tolerates poor and even rather alkaline soils that would sulk most other bonsai species, and despite the clay the tree had built fine roots everywhere, including high on the base. It had not particularly suffered; it had simply organised its roots in all the wrong places.
That is the diagnosis in one sentence: plenty of roots, wrong geometry. Thick dominant roots sat too high on the crown. Vertical roots dived straight down. Some roots ran diagonally back under the trunk in the wrong direction, and one, lifted clear of the soil for years, had simply dried out. But there was one piece of genuinely good news, and it shaped the whole plan: live roots emerged all around the circumference of the base. Nothing was missing — so no grafts, no approach work, none of the complicated repairs a one-sided base demands. At this tree’s age, even a board under the roots was judged unnecessary. Everything could be solved with selection: keep the right roots, remove the wrong ones, and persuade the tree to root where the design wants it to.
Root Triage: What Stays, What Goes
What I do in the video is the same decision taken over and over, root by root. The criteria, in the order they were applied:
- Vertical roots go. Anything diving straight down from the crown was removed completely — these are the roots that anchor the “step” in place and contribute nothing to a radial base.
- Thick, high roots go or get shortened. A dominant root hoards the flow. Removing or cutting it back redirects energy into the finer roots at the level where rooting is actually wanted.
- Dead material goes. The dried root, and sections gone hollow or soft, were cleared back to sound wood.
- Fine roots high on the base stay. Even growing out of clay, these are the raw material of the future nebari — they were the ones spared throughout.
- Salvageable but misplaced roots get shortened, not removed. A cut back to green wood, with luck, makes the root back-bud closer to the trunk.
- Useful roots that sit too low stay — for now. Here I’m clear about the limit: strip a tree of every “wrong” root in one session and the plant waves you goodbye. The low roots keep the tree alive this year. They were shortened, in some cases physically repositioned upward, as a signal of where the tree should invest — and their full removal is deferred to a later repot.
That staged approach is the same principle that governs root pruning on any established bonsai: the question is never only “which roots are wrong?” but “how much can go this time?”.
Burying a Beautiful Nebari to Make It Better
Now the counterintuitive part. After all that cleaning, the spectacular conical base — the tree’s best feature — was planted deeper, deliberately hidden under the substrate. Before you have something beautiful to show, you sometimes have to hide it for a while.
The logic is straightforward once the goal is clear. New roots only form where there is buried, consistently humid tissue; an exposed crown grows no roots at all — exposure is precisely how the high, dry side of the base ended up defective. Burying the crown puts the cut stumps and the spared fine roots into rooting conditions, so that a new, flat, radial root line can form higher up — at the line where the base is widest. Once that new plate establishes, the remaining low and vertical roots can be removed safely at a future repot, the tree can come back up to its display height, and the step will be gone: the base will flare directly into the soil, with no shelf of dead-looking wood in between. One season of worse looks, traded for a permanently better base.
A Substrate for Refinement, Not Vigour
The old clay was cleaned out completely, and the mix that replaced it says a lot about reading a tree’s stage correctly: a large share of pumice, plus lava and zeolite, a little akadama — and only a minimal fraction of peat, keeping the whole root zone breathing. Olives will forgive coarse, lean substrates; what they resent is suffocation.
Just as deliberate is what the mix is not: it is not a recipe for pushing growth. This olive is an advanced plant. It does not need to thicken a trunk or extend long sacrifice branches — it needs to fix defects and refine ramification. A lean, airy, mineral-heavy mix supports steady, controlled growth and excellent root health without the coarse surge that a development-phase tree would want. Matching the substrate to the phase — vigour for building, restraint for refining — is one of the quiet decisions that separates a plan from a collection of repots.
The Sphagnum Ring: New Roots at Exactly the Right Height
The most precise move of the session came at the end of potting. Substrate was filled only up to the target root line — the exact height where the new nebari should form. Then, before topping up, a ring of sphagnum moss was packed tightly around the cut root stumps, directly against the wounds, and only then was the remaining substrate added over it.
Placement is the whole technique. Sphagnum holds humidity against the cut tissue better than any granular mix, and capillary roots form preferentially inside that wet collar — so the ring functions as an instruction: root here, at this height, all the way around. What matters is not how thick the sphagnum layer is but that it sits in direct contact with the stumps at the chosen line. If the tree obeys, next year’s repot finds a young radial plate exactly where the widest point of the base meets the soil — and the low roots that are still feeding the tree today can start coming off.
The container completes the logic: a low, wide geotextile fabric pot, its tall sides simply folded down to the right height. Fabric pots air-prune and encourage exactly the fine, fibrous rooting this project needs, and the folded rim keeps the fresh substrate from washing out. Low and wide pushes roots to spread horizontally — but not too low, because the buried crown needs real depth of cover to stay humid.
Aftercare: A Plastic Bag Until Spring
A session this aggressive removes a serious share of the tree’s water-gathering capacity, so aftercare is about closing the gap between what the leaves demand and what the reduced roots can supply. The tree was watered immediately, before the fine roots could dry, and then bagged — enclosed in plastic to hold humidity around the foliage and cut transpiration losses while the root system rebuilds.
The bag stays on well into spring — April or May — and comes off gradually, opened step by step as the new shoots extend, each extension a report that the roots below are working again. Only then does the olive return to what it actually wants year-round: full, unapologetic Mediterranean sun. The session closed with a light trim of the most aggressive shoots — the apical runner had already done its job of pulling energy upward — and the tree, buds swelling in the returning warmth, was left to do the one thing this year asks of it: grow quietly and root at the new line. Front selection, styling, refinement — all of that waits. There are several possible fronts in those three trunks, and the answer will be clearer once the base underneath is sound.
For the everyday care of the species, sun, water, winter and the pruning routine, see our olive bonsai care guide.
Working an Olive of Your Own?
The olive in this article is for sale, as it is today after this repot: a wild olive in training, about thirty years old, multi-trunk, delivery included.
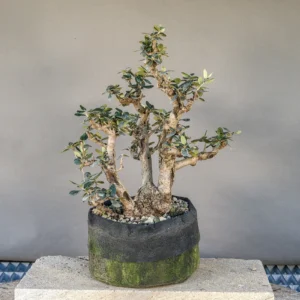
Olive bonsai (Olea europaea sylvestris), multi-trunk, about 30 years
465 €incl. delivery
In stockRoot decisions are the least forgiving in bonsai: leaves regrow in a season, but a base is built — or spoiled — over years. If you are looking at an olive, an olivastro from the field, or any tree whose base makes you hesitate between cutting, burying and air layering, that judgement call is exactly what our one-to-one bonsai consultation is for: photos of your tree, a concrete plan for it, and the order of operations that keeps it alive while the base improves.
Key Takeaways
- A spectacular base can still carry hidden flaws — high plantings produce high, inelegant roots, diving verticals and, over the years, an unnatural “step” at the soil line.
- Olives are forgiving of poor substrate: even in clay and gravel this tree rooted all around its circumference — which meant selection could fix everything, with no grafts needed.
- Triage roots in stages: verticals and thick high roots go, fine roots stay, and misplaced-but-useful roots are shortened or repositioned — never strip a tree of all its working roots in one session.
- Burying a good nebari is sometimes the way to improve it: cut stumps only root under humid, buried cover, and the new radial line should form at the widest point of the base.
- Sphagnum packed tightly against the cut stumps acts as a targeting system, concentrating new capillary roots at exactly the chosen height.
- Match the substrate to the phase: an advanced tree in refinement gets a lean, airy, mineral mix — pumice, lava, zeolite, a little akadama, minimal peat — not a vigour recipe.
- After radical root work: water at once, bag until April–May, open the bag progressively as shoots extend, then return the olive to full sun.
Frequently Asked Questions
When should you repot an olive bonsai?
At the end of winter, as the warmth returns and just before the tree pushes into growth — this session took place in late February in northern Italy. An olive repotted then has the whole season ahead to rebuild its roots. If the work is aggressive, protect the tree afterwards: humidity under a plastic bag until spring is established, then a gradual return to full sun.
What soil mix does an olive bonsai need?
Less than you would think, and airier than you would think. Olives tolerate poor and even alkaline soils, but they resent a suffocated root zone — heavy clay is the real enemy. A free-draining mineral mix of pumice, lava rock and zeolite, with a little akadama and only a minimal fraction of peat, keeps the roots breathing. For an advanced tree in refinement, lean is a feature: you want controlled growth and root health, not a vigour surge.
Can you make a bonsai from a wild olive (olivastro)?
Yes — the wild olive is prized bonsai material in the Mediterranean tradition. Compared with cultivated olives it tends toward smaller leaves, denser twigging and a tougher, more rugged character, and it shares the species’ willingness to back-bud and to rebuild roots after hard work. This tree’s three-trunk ceppaia base, with its broad conical flare, is exactly the kind of feature that makes wild material worth years of patient correction.
What is the “step” on an old bonsai’s base, and how do you fix it?
The step is a shelf-like discontinuity where the exposed root crown narrows before it reaches the soil — the signature of a tree planted too high, often in too tight a pot, over many years. The fix is staged: remove the vertical and high dominant roots you can afford to lose, plant the tree deeper so the crown sits in humid cover, and use a sphagnum ring to concentrate new radial roots at the height where the base is widest. Once that new root line establishes, the remaining low roots come off and the step is gone.
Why would you deliberately bury a bonsai’s nebari?
Because roots only form on buried, humid tissue. Hiding a good base for a season or two puts the cut stumps and fine upper roots into rooting conditions, so a new, flat, radial root line can form at exactly the right height. It is a trade: the tree looks worse this year so that the base can be permanently better — first build, then show.