Look at any bonsai that stops you in your tracks and your eye almost certainly went to the base first. The nebari — the visible surface roots radiating from the trunk into the soil — is what makes a small tree read as an old one. And it is the one feature you can barely fake later: by the time a trunk has thickened, the roots underneath have already decided what they are. Most growers meet the problem at that late stage, when every option is slow, invasive, or both.
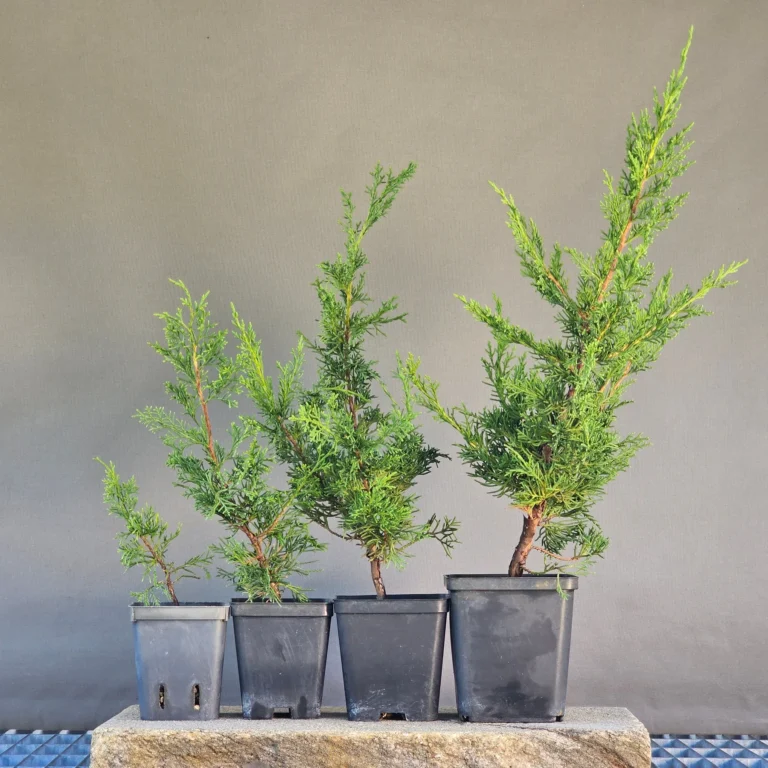
This article is about the other path: building a bonsai nebari from day one, on young material, so that radial roots are never a correction — they are the plan. It follows two real work sessions from our benches in February: a batch of Acer palmatum seedlings fitted with an ordinary metal washer, and a batch of trident maples whose trunks were already too thick for any washer — where the same principle was applied with a blade and a length of wire. Both sessions are here on video, mistakes included, because the mistakes are where most of the learning lives. If what you have is an older tree whose base is beyond saving, the express route is different — see our guide to air layering for a ready-made nebari.
What Is Nebari — and Why It Decides So Much
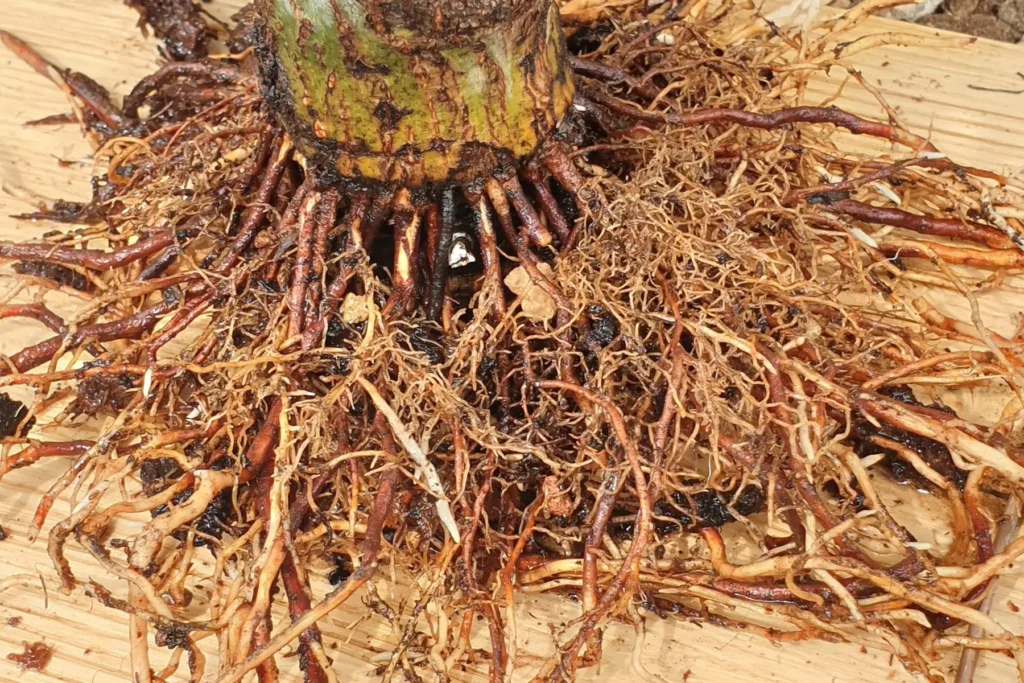
Nebari (根張り) is the flare of surface roots at the base of the trunk. On a convincing bonsai they radiate outward like the spokes of a wheel, flat and even, gripping the soil the way an ancient field tree grips a hillside. The nebari does the quiet work of persuasion: it announces age, stability and calm before anyone has looked at a single branch.
What ruins a nebari is equally specific: a taproot diving straight down, one or two dominant roots hoarding the flow while the rest stay thin, roots emerging at different heights on the trunk, or a base that narrows before it widens — reverse taper, the least forgivable fault of all. Every one of those defects traces back to the same cause: the roots were allowed to organise themselves. The techniques below exist to take that decision away from the tree, at the moment it costs the least.
The Washer Trick: Radial Roots on Seedlings
Enjoying this tutorial? Subscribe to our YouTube channel for more bonsai videos →
The idea could not be cheaper: a plain metal washer, threaded onto the seedling’s root line so the trunk passes through the hole, buried at the level where you want the future nebari. The washer physically interrupts the downward flow of elaborated sap. Sugars and auxins accumulate just above the metal, and the tree responds the only way it can — by pushing new roots out at exactly that plane. Because the obstruction is a flat ring, the response is a flat ring too: roots emerging together, at one height, in every direction. Radial nebari by construction, not by luck.
In the February session the washers had been in place for a year, and the batch of seedlings came out of their communal crate to be potted individually. That is when the technique shows its second virtue: control. Where a washer had produced roots, the strongest were shortened so no single root could seize dominance. Where there was callus but no roots yet, a light cut re-exposed the cambium to try again. And in every case the original root mass below the washer stayed on — not as a keepsake, but as the engine. Those lower roots drive the growth that thickens the trunk; they are sacrifice roots, feeding the project until the new radial plate can take over, and they will be removed in stages once it does.
The seedlings went into small pots in our usual free-draining mix — peat, pumice, lava and zeolite — with the washer sitting horizontal and safely below the surface. Both of those details turn out to matter more than anything else in this article.
Why a Washer Fails: Lessons from a Year Later
A year of results teaches more than any theory. Some of the seedlings in the video rooted beautifully above the washer; others built callus and nothing more. The difference came down to three faults, all of them avoidable:
- The washer surfaced. Substrate settles after a few waterings, and a washer set too high ends up exposed to the air. An exposed ring strangles the trunk without triggering a single root, because the callus above it needs constant buried humidity to convert into roots. Plant deliberately deep. Too deep is a small problem — roots that emerge high on the trunk can simply be removed later; a dry, exposed callus is a wasted year.
- The washer sat tilted. Roots initiate preferentially on the downhill side of a slanted ring, and you unpack a one-sided fan instead of a wheel. The washer must lie flat and horizontal when the seedling is potted, and stay that way.
- The geometry was wrong. A hole of three to four millimetres around the root line is correct — snug enough to interrupt the flow. Just as important is a generous ring width: with a narrow ring, the swelling tissue above can roll over the edge and fuse with the tissue below, bridging the interruption and quietly cancelling the whole technique. Where that threatened, the session’s answer was a knife cut above the ring to keep the separation real.
Even the washers that failed to produce roots were not wasted. A year of interrupted flow concentrates auxins right where the next cut will go, priming the tissue to root; and the ring itself makes a perfect mechanical guide for the blade. The failed washer becomes the map for the repair.
When the Washer Doesn’t Fit: Thicker Trunks
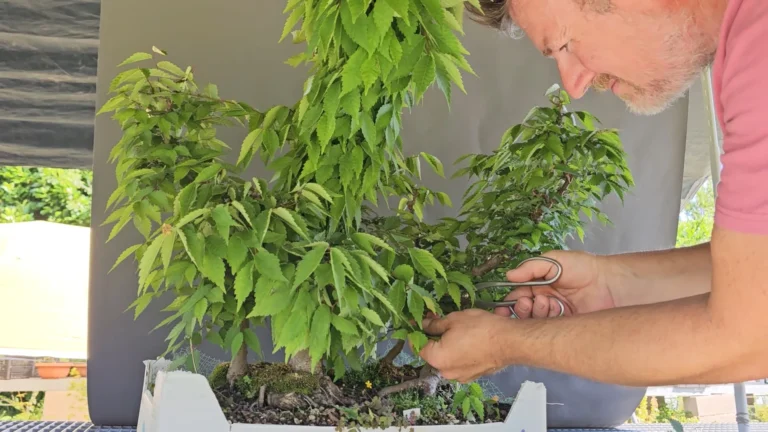
The second video answers a question that arrived through the channel’s comments: does the trick scale up? On a trunk with real thickness, curves and low branches, threading a washer is physically impossible — and no hardware store sells washers that size anyway. But the washer was never the point. The principle is the interruption: stop the descending sap at a chosen height, and the tree must root there. On thicker stock — in the video, a batch of young trident maples — the interruption is made with a blade and secured with wire.
The order of operations, from the session: first choose the height, which on these tridents was the widest point of the lower trunk — placing the future roots there swells the base at exactly that line and erases the reverse taper below it. Then the cut that matters: a clean, precise incision around the trunk at that height, because this upper edge is where the new roots will emerge, and a ragged cut gives a ragged nebari. A second incision goes in lower down, as far from the first as the base allows. Between the two, the bark ring is cleared — and it is fine to cut a little deep; the enemy here is not the wound but the bridge.
The bridge is what kills this technique: callus rolling across the gap, reconnecting the canopy to the old roots, at which point the tree has no reason to build new ones. The session’s insurance is a tourniquet — recycled aluminium wire, wrapped in several tight turns and cinched hard with pliers, sitting close below the upper cut but never covering it. Rooting hormone is optional (“it doesn’t hurt”); the wire is not.
Aftercare follows the same logic as the washer: the tree is potted deep, incision safely below the surface where humidity stays constant — these tridents went into geotextile fabric pots, which encourage exactly the fine, fibrous rooting the project needs. And critically, the canopy stays on. The vigour of callus formation and new rooting is proportional to the leaf mass feeding it, so branch selection waits for spring and styling waits for next year. One of the tridents in the video, with its low curve and a radial plate on the way, is already whispering shohin.
The Timeline: What Happens When
Both techniques run on the same calendar, and it is slower than the videos make it feel:
- Late winter, year zero — at repotting time, thread the washer onto seedlings, or incise and wire thicker stock. Then let the tree grow hard all season: vigour is the fuel, so feed generously and do not style.
- Late winter, year one — check the results at the next repot. Shorten precocious roots so nothing dominates, re-cut where there is callus but no roots, reset the depth so the ring or incision stays buried and horizontal.
- Years two and three — the new radial plate takes over; the original root mass below is reduced in stages and finally removed. From here the work becomes ordinary root pruning at each repot, shortening and dividing to build density — the same logic, at the same time of year, as root-pruning an established tree.
If the material in front of you is already too old for this game — a thick trunk whose base will never be good — the answer is not force but cloning: an air layer builds a complete radial nebari on the best section of the tree and lets you keep only that.
Start With Material Worth the Years
The washer trick costs almost nothing in money and everything in patience — which is exactly why it belongs on material with a future. A seedling with good genetics, short internodes and early movement rewards three years of root-building; a coarse one does not. Our young pre-bonsai are selected and worked with this in mind, several already carrying their first root corrections. If you are starting with a Japanese maple, its care guide and our notes on developing Acer palmatum for bonsai cover the rest of the journey; trident growers will want the Acer buergerianum guide. And if you are staring at a specific base wondering whether to washer, incise or layer it, that decision is precisely what our one-to-one bonsai consultation is for.
Key Takeaways
- Nebari is built, not found — and it is cheapest to build at the seedling stage, before the roots organise themselves.
- A buried metal washer interrupts the descending sap and forces a flat, radial ring of roots at one chosen height.
- The three washer-killers: a ring that surfaces as substrate settles, a ring that sits tilted, and callus bridging over a too-narrow ring.
- Plant deep. High roots can be removed later; an exposed, dried callus is a lost year.
- On trunks too thick for a washer, the same principle works as a clean circular incision plus a tight wire tourniquet — the upper cut is where the new roots will emerge, so make it precise.
- Keep the original roots below as sacrifice roots until the new plate can feed the tree, and keep the canopy on — rooting vigour is proportional to leaf mass.
- Expect a multi-year timeline: interrupt in year zero, correct in year one, hand over in years two to three.
Building the base from day one is the cheap route. For the other end of the timeline — an old wild olive whose overexposed nebari needed radical root pruning, a buried crown and a sphagnum ring — see fixing a nebari with hidden flaws.
The base is also the first thing to judge before a tree is ever yours: it is criterion number one when buying raw material. If you are still choosing that first tree, start with what a pre-bonsai is and how to pick a good one.
Frequently Asked Questions
What is nebari on a bonsai?
Nebari is the visible flare of surface roots at the base of the trunk. On a well-built bonsai the roots radiate outward in every direction, flat and even, at a single height — which is what gives a small tree the stability and age of a full-sized one. Its classic faults are a diving taproot, one or two dominant roots, roots emerging at different heights, and reverse taper at the base, and all of them are easiest to prevent when the tree is young.
How does the washer technique create radial roots?
The seedling’s root line is threaded through an ordinary metal washer, which is then buried at the height where the future nebari should sit. The ring interrupts the downward flow of elaborated sap, so sugars and auxins accumulate just above it, and the tree responds by pushing new roots out at that exact plane — in every direction at once, because the obstruction is a flat circle. The result is a radial, same-height root base built into the tree from the start.
Why did my washer not produce any roots?
The usual culprits are three. The washer surfaced — substrate settles after watering, and an exposed ring strangles the trunk without rooting it, because the callus needs constant buried humidity. The washer sat tilted, so roots initiated only on the low side. Or the ring was too narrow and the callus bridged over its edge, reconnecting the flow and cancelling the stimulus. Even then the year is not fully lost: the accumulated auxins prime the tissue, and a clean cut just above the washer will usually trigger the rooting the ring failed to.
How do you build nebari on a trunk too thick for a washer?
Apply the same interruption with a blade: a clean, precise circular incision at the height where the roots should emerge — ideally the widest point of the base, which also corrects reverse taper — plus a second incision lower down, with the bark cleared between them. A tight tourniquet of aluminium wire, cinched just below the upper cut without covering it, stops callus from bridging the gap and reconnecting to the old roots. Pot the tree deep so the incision stays humid, keep the foliage on to power the response, and treat it as a two-to-three-year project.
When should you start building nebari — and when is it too late?
The cheapest moment is the seedling stage, where a washer placed at the first repot decides the root base for life. Young trunks that outgrew the washer still respond well to the incision-and-tourniquet version. On old, thick material with a hopeless base the answer is usually an air layer, which grows a complete new radial nebari on the best section of the trunk. It is never strictly too late — but the later you start, the more the technique shifts from prevention to surgery.