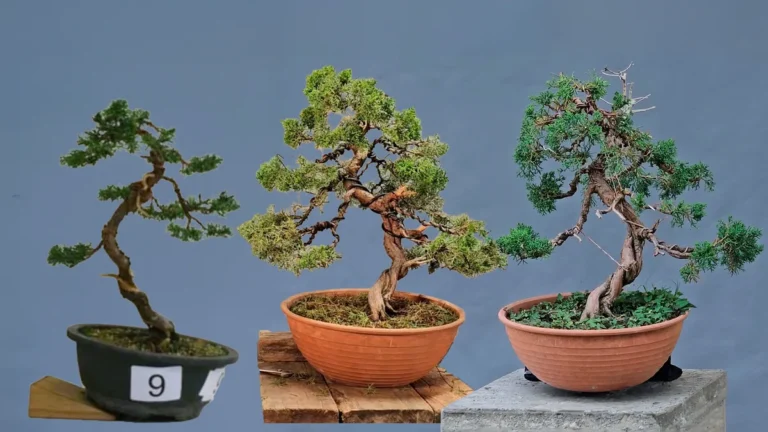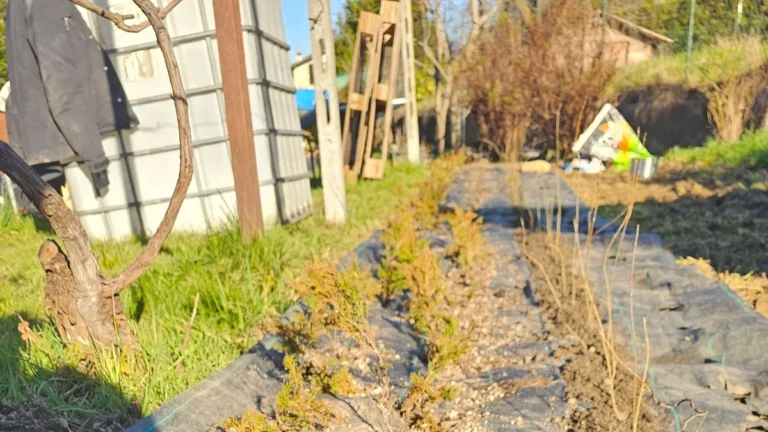
Air layering is one of the most powerful propagation techniques in bonsai — and yet its importance is often underappreciated. While cuttings are faster and simpler to prepare, they are notoriously hard to strike: a small mistake in timing, humidity, or substrate can easily result in zero success from an entire batch. And even when they do root, you cannot control where roots emerge along the trunk line.
With air layering, you choose exactly where the roots will emerge. The result is a radial nebari from day one — something that would take three to five years to develop from a cutting.
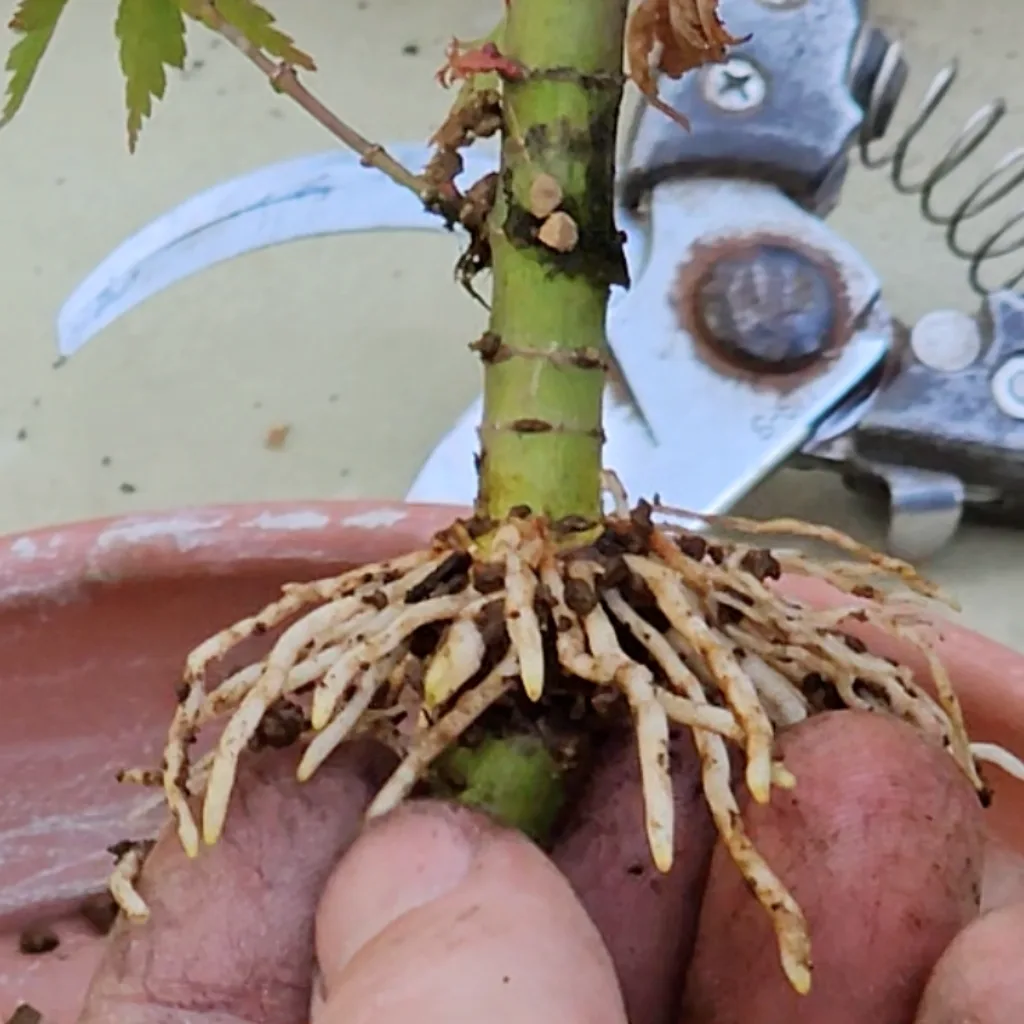
In this guide, Luca Valagussa walks through his complete air layering process on an Acer palmatum variety Ukon: where to cut, what substrate to use, how to wrap, and when to separate. He also opens three air layers made the previous autumn to show real results — roots distributed evenly around the entire circumference, already ramifying.
The maples we produce with this exact technique are available in the shop: air-layered Acer palmatum ‘Kotohime’, with the radial nebari already formed.
Enjoying this tutorial? Subscribe to our YouTube channel for weekly bonsai content →
Why Air Layer Instead of Cuttings
Both cuttings and air layers produce new plants from existing material. But for bonsai, where root structure defines the quality of the final tree, the difference is significant.
Cuttings are faster. You take a branch, stick it in soil, and — if you’ve done everything right — roots will appear within weeks. The problem is twofold. First, they are hard to strike: if conditions are not exactly right, you may easily have a zero percent success rate on an entire batch from a single small mistake. Second, even when they do root, if you’re not lucky, you may end up with only a few dominant roots emerging at different heights along the trunk line. This potentially means years of corrective work before the nebari looks as good as what you get with an air layer.
Air layering forces root production at a single, precise point — the upper edge of the bark ring you remove. Because the descending sap flow is interrupted there, the plant has no choice but to produce roots exactly where you want them. The roots emerge radially, at the same height, forming a compact base that is already a functional nebari the moment you separate it.
The practical advantage: you skip three to five years of nebari development compared to starting from a cutting. For anyone working with quality young pre-bonsai material, this head start is enormous.
Air layering also lets you recover pruning material that would otherwise be discarded. Instead of throwing away a branch with interesting movement, you turn it into a new tree — with the taper and curves already built in.
Where to Air Layer: Choosing the Right Spot
Not every point on a tree is worth air layering. The best positions share two characteristics: they are useful as future trees, and they are expendable on the parent plant.
Below a bifurcation. Where two or three branches feed a single trunk segment, there is more energy concentrated in one spot. This means faster rooting and more vigorous root production. In the video, Luca identifies a section on his Ukon maple where three branches converge — an ideal air layering point.
Above a straight, uninteresting section. If the lower part of a branch is straight and boring but the upper part has movement and taper, air layer above the boring section. The new tree starts with built-in character, and you eliminate the weakest part of the design.
Where you already planned curves. Luca deliberately wires movement into young branches with the specific intention of air layering them once they thicken. This forward planning — shaping branches years before separating them — produces air layers with established trunk movement that would be impossible to achieve after the fact.
Taper matters. Look for points where the trunk section above the cut is thinner than below. When you remove the lower portion after separation, the remaining tree already has natural taper — one of the hardest qualities to develop later.
Branches to avoid
Horizontal or angled branches produce lopsided root systems. Because roots follow gravity, a horizontal branch will only root on the underside, leaving the top bare. If you must air layer an angled branch and the tree is in a pot, tilt the pot to make the branch more vertical. On a tree in the ground, try bending the branch upright before layering.
The upper cut is everything. This is the single most critical decision. The incision defines exactly where your nebari will form — every root will emerge at this line. Once you cut, there is no adjustment. Take your time choosing the height.
When to Air Layer (and When Not To)
The conventional advice says spring. Luca’s approach is broader: he air layers throughout the growing season, with two hard stops.
Avoid the period before and during winter dormancy. The plant cannot heal the wound or produce roots when metabolic activity is shutting down. A fresh incision going into winter risks infection and tissue death.
Avoid peak summer heat. Extreme heat stresses the plant and dries the wound before callus can form. The combination of transpiration demand and limited moisture around the cut makes summer air layers unreliable.
Everything else is fair game. Spring, just before the vegetative push, is the most productive window. Air layers made in April on a vigorous young Acer palmatum can show abundant roots in four to eight weeks. But early autumn works too — Luca demonstrates three Koto Hime air layers made in September that rooted successfully and were ready to separate the following spring.
The key distinction is not calendar date but plant energy. As long as the tree has time to callus and begin root production before the next dormancy, the air layer will work. Spring layers root faster because the vegetative push is stronger. Autumn layers are slower but still reliable — they callus before winter, survive dormancy, and complete rooting when growth resumes.
The Complete Technique: Cut, Wrap, and Seal
Making the cut
The goal is to remove a ring of bark and, critically, the cambium layer underneath. This interrupts the downward flow of sap while keeping the upward flow intact through the xylem (the white wood). The plant above the cut stays alive but is forced to produce roots at the incision point.
Step 1 — Score the upper line. Use a sharp, sterilised blade or a grafting ring tool. Luca uses a specialised grafting instrument that clamps around the trunk and rotates, cutting a perfectly even circumference. The cut must be clean and precise — a ragged edge produces uneven rooting.
Step 2 — Score the lower line a few centimetres below and remove the bark strip between the two cuts.
Step 3 — Scrape away the cambium. This is the step most people rush and most air layers fail on. After removing the bark, a thin greenish layer remains on the wood — this is the cambium. If any of it stays, it will produce callus tissue that reconnects the severed bark, restoring sap flow and defeating the entire purpose. Scrape carefully with a blade until you see only clean white wood all the way around.
The ring must be perfectly horizontal. Even a slight tilt concentrates roots on the lower side and leaves the upper side bare. On a perfectly vertical trunk, this is straightforward. On an angled trunk, take extra care to keep the cut level.
Wrapping
Step 4 — Prepare materials. You need: a piece of clear plastic (cellophane), two lengths of aluminium wire, adhesive tape, and your substrate. Pre-cut several strips of tape — trying to cut tape while holding a loaded wrap with one hand is a recipe for frustration.
Step 5 — Position the plastic. Wrap it around the trunk below the cut. The substrate must sit just above the incision — not below it, or the exposed wood dries out before rooting begins. If there are small branches below the cut, use them as a natural shelf to support the wrap.
Step 6 — Fill with substrate (see next section for substrate choice). Push it gently around the cut with a stick to eliminate air pockets. The substrate must be in direct contact with the incision line.
Step 7 — Shape and seal. Close the wrap into a sweet-shaped package (Italians call it caramella). Wire the bottom tightly. Seal the vertical seam with tape. Leave the top slightly open — this allows rainwater to enter naturally and provides oxygen exchange. A completely sealed wrap risks suffocation.
Step 8 — Water thoroughly. Pour water into the top opening until it flows through and drains from the bottom. If it does not drain, poke small holes in the base to prevent waterlogging.
Stability is critical. One of the biggest risks is not failure to root — it is the wrap moving and tearing young roots. Secure everything firmly. Check periodically that nothing has shifted.
Substrate: Akadama vs Sphagnum vs Peat
Luca has used all three substrates extensively. Each works, but they produce meaningfully different results.
Akadama — Luca’s preferred choice
Akadama produces the finest, healthiest roots of any air layering substrate. The roots emerge with a characteristic healthy colour, well-oxygenated, and — most importantly — they begin ramifying on their own without pruning. When you open the wrap, akadama falls away cleanly, leaving the roots fully visible and easy to work with.
Akadama also changes colour visibly when it dries, making it easy to monitor moisture levels through the transparent plastic without opening the wrap.
The only limitation: akadama works best in a sealed or semi-sealed wrap (cellophane) because it does not retain moisture as long as sphagnum. In an open plastic sphere, it dries too quickly.
Sphagnum moss — the classic
Long-fibre sphagnum moss is the traditional air layering substrate and it works reliably. It holds moisture well and promotes strong root growth.
The downside is removal. Sphagnum fibres tangle with fine roots, making it difficult to clean without damaging them. The roots produced tend to be thicker and less branched than those grown in akadama, which means more corrective work during the first repotting.
Peat moss — the practical alternative
Sphagnum peat (not to be confused with long-fibre sphagnum) mixed with a small amount of pumice is Luca’s go-to when akadama is not available. It is compact, retains moisture well, and works particularly well in open plastic air layering spheres where you need a substrate that does not dry out quickly.
| Akadama | Sphagnum moss | Peat + pumice | |
|---|---|---|---|
| Root quality | Fine, ramified from the start | Thick, less branched | Medium |
| Ease of removal | Excellent — falls away clean | Poor — tangles with roots | Good |
| Moisture retention | Moderate — needs sealed wrap | High | High |
| Moisture monitoring | Easy — colour change visible | Difficult | Difficult |
| Best used in | Cellophane wrap (sealed) | Any wrap type | Open plastic spheres |
| Availability | Bonsai suppliers | Garden centres | Garden centres |
Opening, Separating, and Potting
When to open
The air layer is ready when roots are visible around the entire circumference of the wrap. On a spring layer, this typically takes four to eight weeks for vigorous species like Acer palmatum. Autumn layers may need until the following spring.
You have a choice: wait longer for more roots and a safer separation, or open earlier for better root control. Luca deliberately opens his air layers on the early side. While it may look a bit risky — we don’t think it is — the advantage is significant: young, thin roots are easy to position and direct. Left too long, roots thicken, coil, and become difficult to arrange into a clean radial pattern.
Whichever timing you choose, the critical rule after separation is the same: protect the new plant from sun, wind, and excessive transpiration. This matters far more than the quantity of roots at separation time. Luca keeps newly separated air layers in an enclosed growing chamber with no direct wind or harsh sun.
Separating
Open the wrap gently. With akadama, the substrate falls away and the roots are immediately visible. With sphagnum, you will need to tease fibres out carefully with a chopstick.
Check that roots are distributed around the full circumference. If one side is bare, close the wrap and wait longer.
Cut the branch just below the bottom of the wrap. If there is a shoot below the cut on the parent tree, preserve it — this gives the parent a ready-made continuation.
The polyethylene disc trick
Before potting, Luca cuts a disc from a sheet of high-density polyethylene — flexible plastic with some rigidity, not cellophane. He slits it to the centre, slides it under the root ball at the base, and uses the remaining trunk stump below the roots as an anchor.
This disc forces every root outward horizontally rather than downward. The nebari spreads from day one. It is a small addition that accelerates radial root development significantly.
Root pruning and potting
Gently comb the roots outward over the disc. Trim them lightly to equalise energy distribution and encourage further ramification — do not remove more than necessary.
Pot into a small container with peat-based substrate (not akadama at this stage — you need the compactness for stability). Press the soil firmly. The trunk stump provides additional anchoring, which is especially useful if you cannot wire the tree to the pot.
If the tree will be kept in a protected environment (greenhouse, growing chamber), wiring to the pot is optional. If it will be outdoors exposed to wind, secure it with wire through the drainage holes — even a small gust can topple a freshly potted air layer and destroy months of root development.
After repotting, keep the plant sheltered until new growth appears. Once the tree is pushing new leaves, the root system is established enough to begin normal cultivation.
Case Study: A Double Air Layer That Built a Nebari in Two Years
Everything in this guide comes together in one of Luca’s own projects: a seed-grown Acer palmatum — a yamamomiji-type maple that sprouted spontaneously near a nursery, with unusually elegant, narrow-lobed leaves that hint at cultivar genetics. The original goal was simply to propagate it. In April 2023 Luca applied three air layers at once, two of them consecutive on the same branch — a double air layer destined to become a father-and-son composition: the thicker, straighter trunk as the father, a flexible one-year shoot as the son.
By June the layer had rooted abundantly. Instead of separating it, Luca began building the nebari while the layer was still on the tree: he removed the substrate, pruned the roots, and fitted a plastic disc just below the girdle so the new roots would run horizontally, perpendicular to the trunk — the same principle as the washer trick, applied in mid-air. Driven by the mother tree’s vigour, the layer had refilled its container with roots by September, after a second pruning in July. Three root prunings before the plant even existed as an independent tree.
He separated it in autumn — partly to let the mother compartmentalise her wounds before the frosts — and gave it its first repot in January 2024: nine months from bare branch to a 2 cm trunk with real taper. By the second repot in February 2025 the base was essentially defined; where gaps remained, Luca cut into the bare sections to provoke callus. At the third repot in February 2026, those incisions had answered with fine new roots — the gaps are closing without a single root graft.
The full three-year evolution — photos and footage of every stage, from the first wrap to the 2026 root work — is in the video below (Italian audio, auto-generated subtitles available).
Key Takeaways
- Air layering produces radial nebari from day one — skipping three to five years compared to cuttings
- The upper cut placement defines where your nebari forms — choose the height carefully before cutting
- Remove the cambium completely, down to clean white wood, all the way around
- The bark ring must be perfectly horizontal to ensure even root distribution
- Akadama produces the finest, most workable roots — but sphagnum and peat work too
- You can air layer throughout the growing season — just avoid winter dormancy and peak summer heat
- Open the air layer early for better root control, or wait longer for a safer separation
- Use a polyethylene disc under the root ball to force roots outward and build the nebari faster
- Protect newly separated air layers from wind and direct sun — this matters more than root quantity
Start with the Nebari Already Built
The trees we produce with this exact technique — cut, wrapped and separated at our nursery — go into the shop with the radial nebari already formed.
Air-Layered Acer palmatum 'Kotohime' – Japanese Maple with Ready Nebari
60 €
Sold out — next batch in preparationAir layering builds a finished nebari on material that already has a trunk. If you are starting further back — with seedlings or young stock — the cheaper route is to build the radial base from day one: see our guide to building bonsai nebari with the washer trick.
Frequently Asked Questions
What is the best time of year to air layer bonsai?
Spring, just before the vegetative push, produces the fastest results — roots can appear in four to eight weeks on Acer palmatum. However, air layering works throughout the growing season. Layers started in early autumn will callus before winter dormancy and complete rooting the following spring. The only periods to avoid are just before or during winter dormancy and during extreme summer heat.
How long does an air layer take to root?
On vigorous deciduous species like Acer palmatum, spring air layers typically show visible roots in four to eight weeks. Autumn layers may take until the following spring. The timeline depends on species vigour, temperature, and substrate — akadama tends to show results slightly faster than sphagnum because of better oxygen availability around the incision.
Why must the cambium be removed completely?
Because even a thin remnant of cambium will produce callus tissue that reconnects the bark, restoring sap flow and defeating the purpose of the air layer entirely. The cambium is a greenish layer that sits just beneath the bark on the white wood. Scrape it away completely with a blade until only clean white wood remains all the way around the circumference.
Can you air layer any bonsai species?
Most woody species respond well to air layering, but vigorous deciduous trees like Acer palmatum produce the fastest and most reliable results. Conifers and slow-growing species can be air layered but take significantly longer and have lower success rates. The technique works best on species with strong sap flow and active cambium growth during the growing season.
What is the polyethylene disc used for after air layer separation?
The polyethylene disc is placed under the root ball at the base after separation. It forces every root outward horizontally rather than downward, which accelerates the development of a radial nebari from day one. Luca cuts a disc from high-density polyethylene, slits it to the centre, and slides it under the roots using the remaining trunk stump as an anchor.